
N.B. I used plain wheat flour instead of the gluten free flours as we were allowed to do this if we couldn’t find the specialist flours.
Ingredients:
1 cup (138 g)(4.9 ounces) Sweet rice flour (also known as glutinous rice flour)
3/4 cup (100 g)(3.5 ounces) Tapioca Starch/Flour
1/2 cup (65 g)(2.3 ounces) Sorghum Flour
1 cup (200 g)(7.1 ounces) Dark Brown Sugar, Lightly packed
1 teaspoon (5 ml) Baking soda
3/4 teaspoon (4ml) Kosher Salt
7 tablespoons (100 g) (3 ½ ounces) Unsalted Butter (Cut into 1-inch cubes and frozen)
1/3 cup (80 ml) Honey, Mild-flavoured such as clover.
5 tablespoons (75 ml) Whole Milk
2 tablespoons (30 ml) Pure Vanilla Extract
Directions:
1. In the bowl of a food processor fitted with a steel blade, combine the flours, brown sugar, baking soda, and salt. Pulse on low to incorporate. Add the butter and pulse on and off, until the mixture is the consistency of a coarse meal. If making by hand, combine aforementioned dry ingredients with a whisk, then cut in butter until you have a coarse meal. No chunks of butter should be visible.
2. In a small bowl or liquid measuring cup, whisk together the honey, milk and vanilla. Add to the flour mixture until the dough barely comes together. It will be very soft and sticky.
3. Turn the dough onto a surface well-floured with sweet rice flour and pat the dough into a rectangle about 1 inch thick. Wrap in plastic and chill until firm, about 2 hours, or overnight.
4. Divide the dough in half and return one half to the refrigerator. Sift an even layer of sweet rice flour onto the work surface and roll the dough into a long rectangle, about 1/8 inch thick. The dough will be quite sticky, so flour as necessary. Cut into 4 by 4 inch squares. Gather the scraps together and set aside. Place wafers on one or two parchment-lined baking sheets. Chill until firm, about 30 to 45 minutes. Repeat with the second batch of dough.
5. Adjust the rack to the upper and lower positions and preheat oven to 350 degrees Fahrenheit (180 degrees Celsius).
6. Gather the scraps together into a ball, chill until firm, and reroll. Dust the surface with more sweet rice flour and roll out the dough to get a couple more wafers.
7. Prick the wafers with toothpick or fork, not all the way through, in two or more rows.
8. Bake for 25 minutes, until browned and slightly firm to the touch, rotating sheets halfway through to ensure even baking. Might take less, and the starting location of each sheet may determine its required time. The ones that started on the bottom browned faster.
9. When cooled completely, place enough wafers in food processor to make 1 ¼ cups (300 mL) of crumbs. Another way to do this is to place in a large ziplock bag, force all air out and smash with a rolling pin until wafers are crumbs.
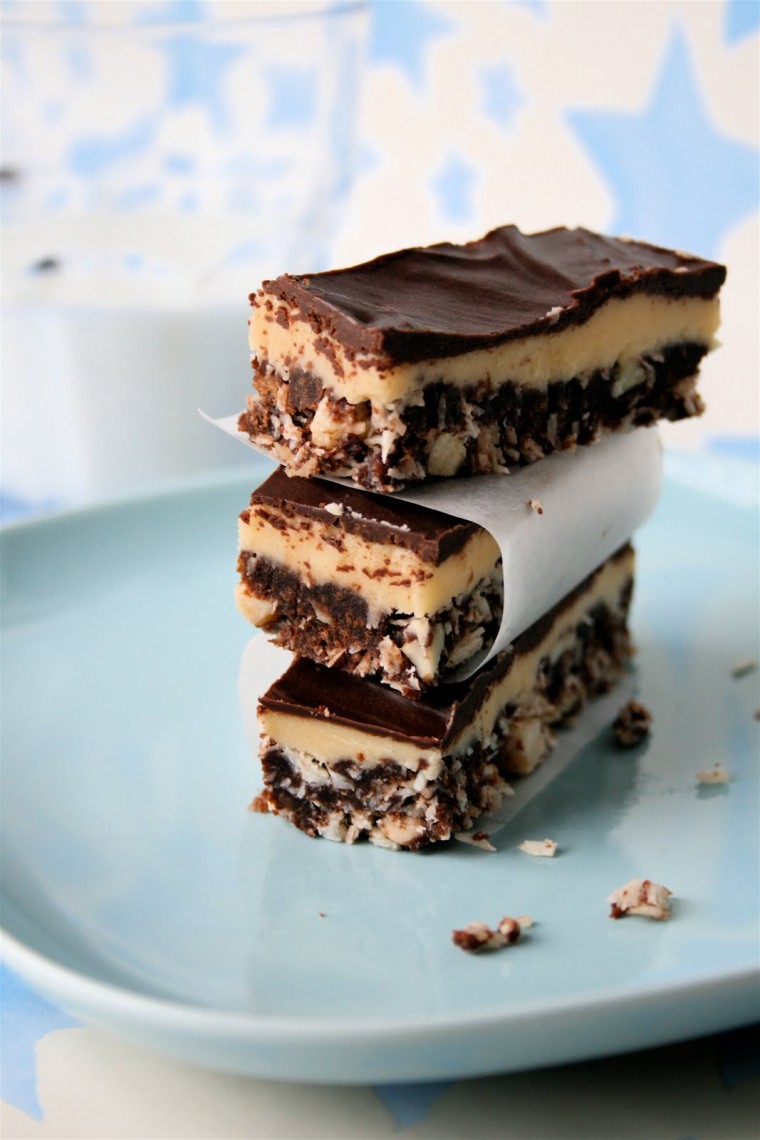
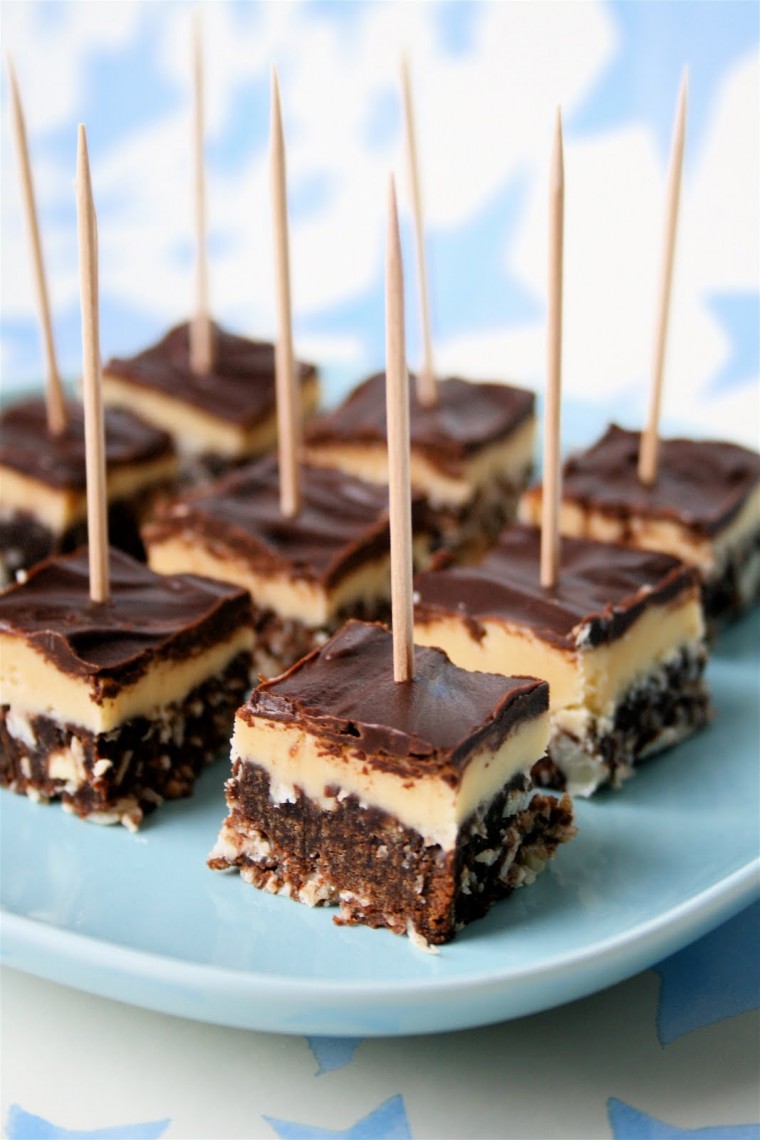
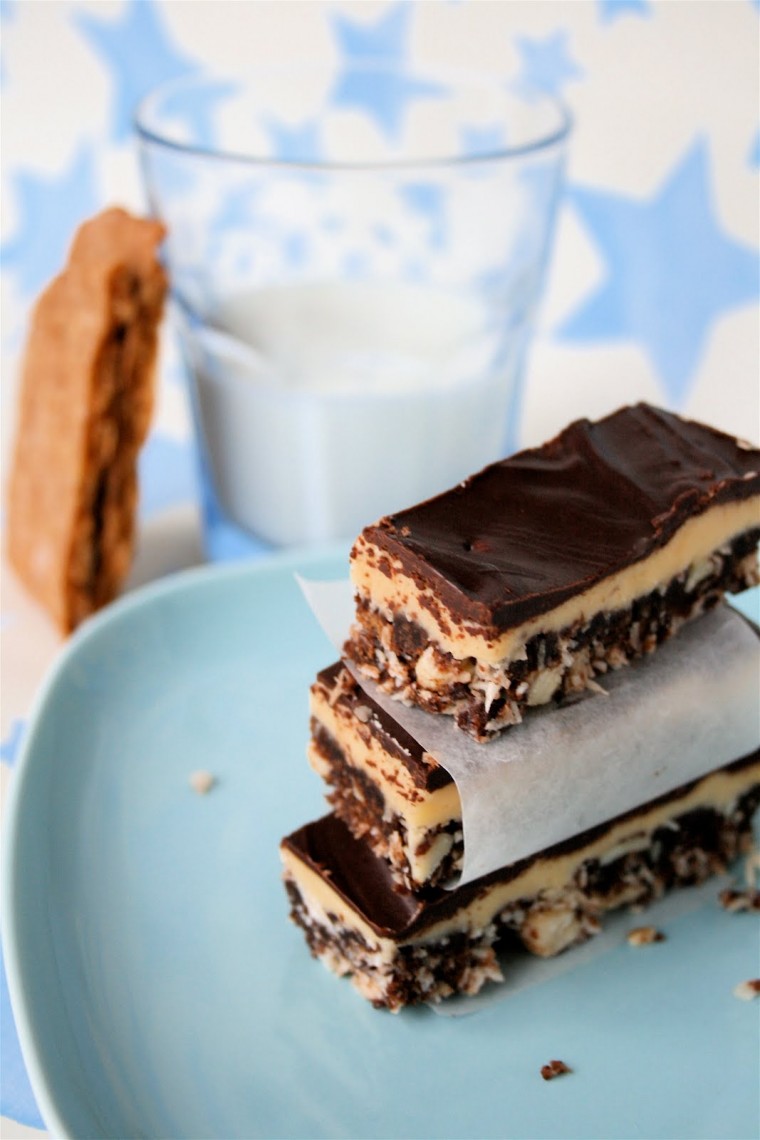
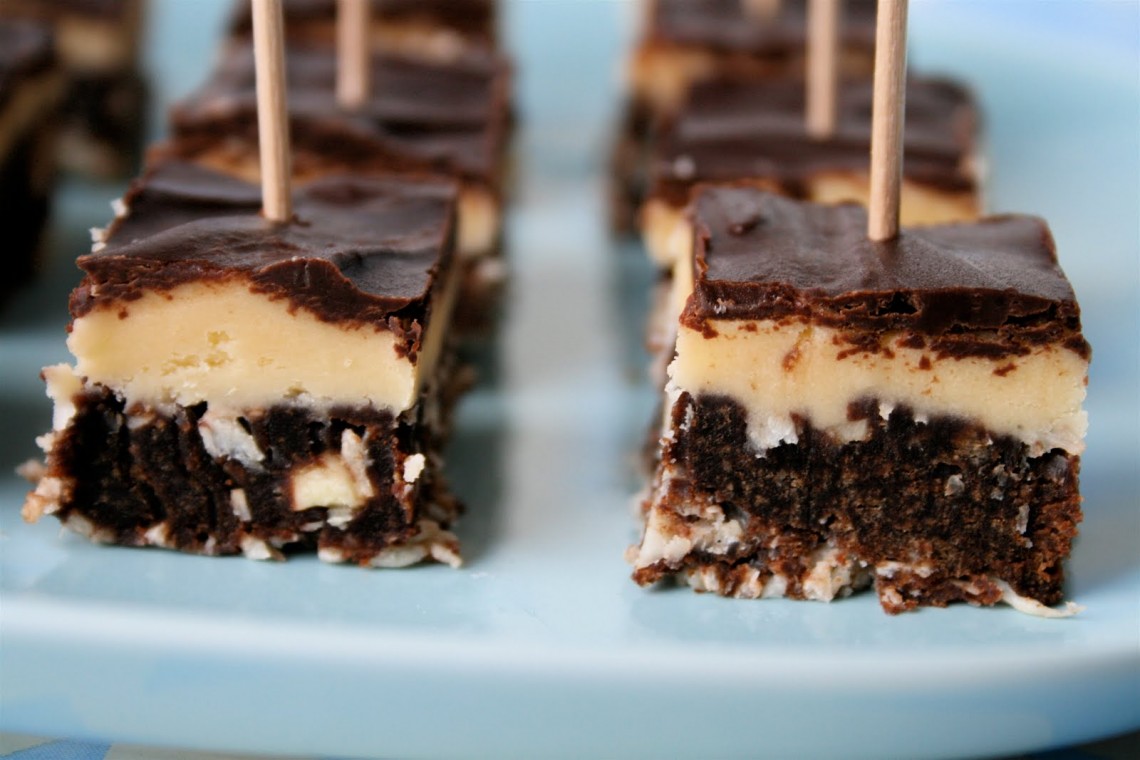
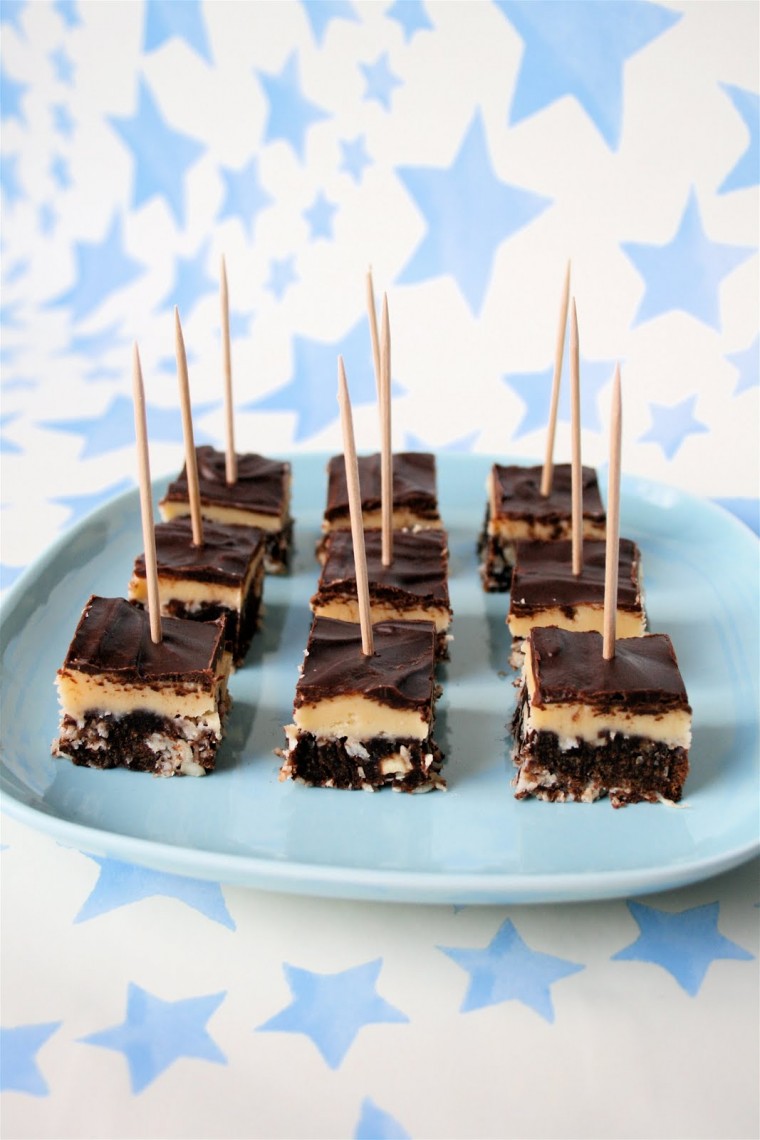
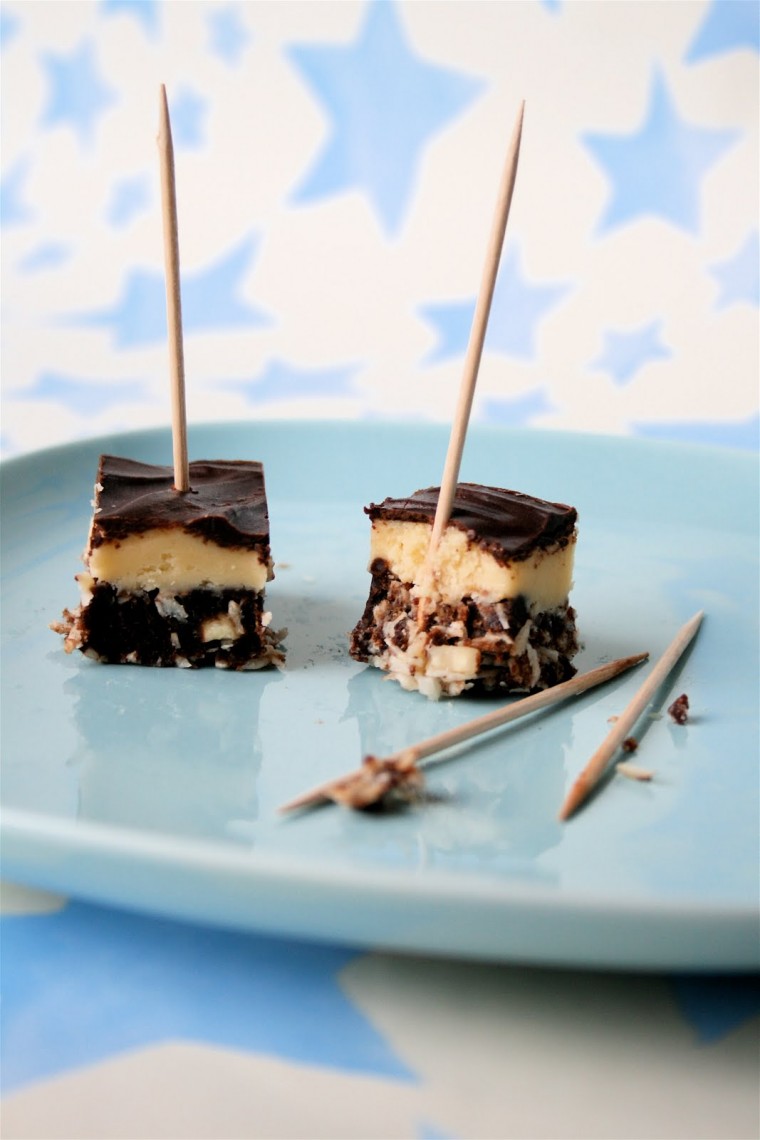
Nanaimo Bars
Ingredients:
Bottom Layer
1/2 cup (115 g)(4 ounces) Unsalted Butter
1/4 cup (50 g)(1.8 ounces) Granulated Sugar
5 tablespoons (75 mL) Unsweetened Cocoa
1 Large Egg, Beaten
1 1/4 cups (300 mL) Gluten Free Graham Wafer Crumbs (See previous recipe)
1/2 cup (55 g)(1.9 ounces) Almonds (Any type, Finely chopped)
1 cup (130 g)(4.5 ounces) Coconut (Shredded, sweetened or unsweetened)
Middle Layer
1/2 cup (115 g)(4 ounces) Unsalted Butter
2 tablespoons and 2 teaspoons (40 mL) Heavy Cream
2 tablespoons (30 mL) Vanilla Custard Powder (Such as Bird’s. Vanilla pudding mix may be substituted.)
2 cups (254 g)(8.9 ounces) Icing Sugar
Top Layer
4 ounces (115 g) Semi-sweet chocolate
2 tablespoons (28 g) (1 ounce) Unsalted Butter
Method:
2. For Middle Layer: Cream butter, cream, custard powder, and icing sugar together well. Beat until light in colour. Spread over bottom layer.
3. For Top Layer: Melt chocolate and unsalted butter over low heat. Cool. Once cool, pour over middle layer and chill.

what a cute little snack – the toothpicks just make them that much cuter. good job with this mo. challenge.
Firstly, welcome to Daring Bakers. 🙂
Secondly, great job on the challenge. I noticed I have the same blue square-ish plate as you. And not only that, I used it in my DB post, too! With the graham crackers on it. How funny! 🙂
Delicious! I just want to reach through my screen and take one. Great job on this challenge!
oh these look fantastic!
i have a little blog where i share beautiful pics, if you would like to share yours send me an email, i would love to add you in!
Love this……….and the fact that you made them bite sized. I am thrilled to learn you can make it step wise…..Makes me wish I'd joined the DBs!!!! Well done